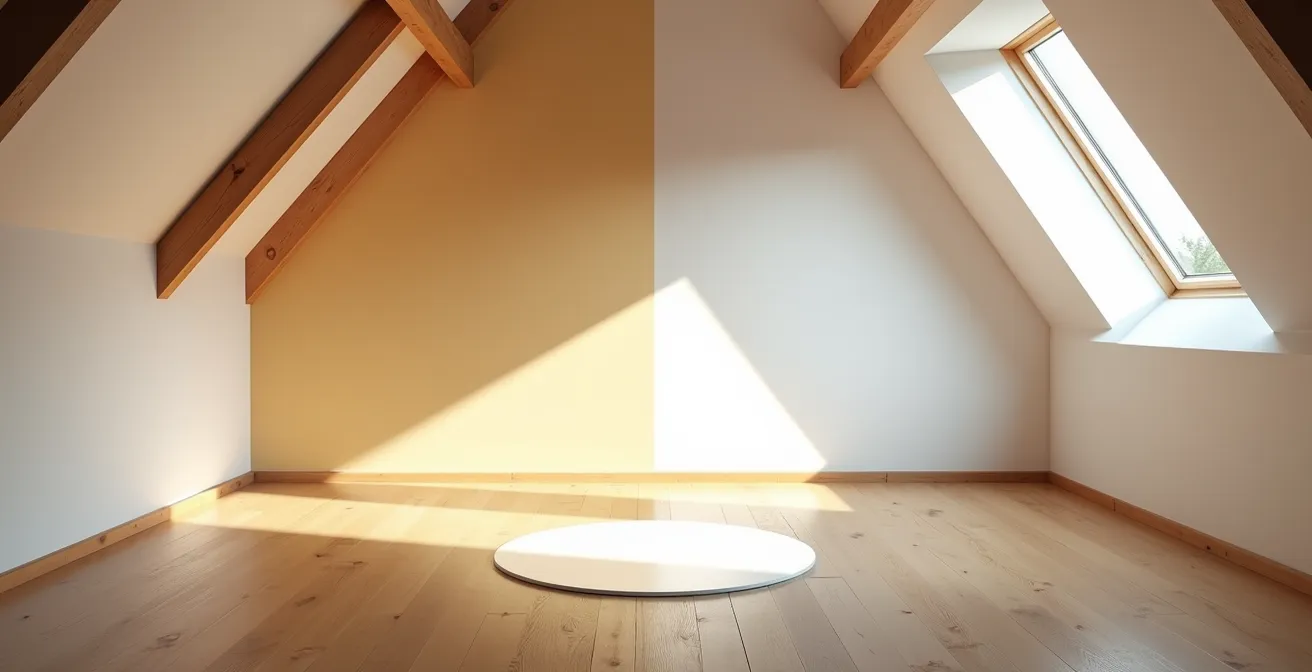
The key to transforming a dark room isn’t just adding a mirror; it’s strategically architecting light as a vital nutrient for your space and your well-being.
- Morning sun exposure is a powerful, science-backed tool for improving mood and regulating your biological clock.
- Mirrors act as amplifiers in a complete light management system that includes sheer curtains, smart positioning, and even indoor plants.
Recommendation: Stop thinking about decoration and start thinking like a lighting architect—sculpting the light you have to create a healthier, more vibrant home environment.
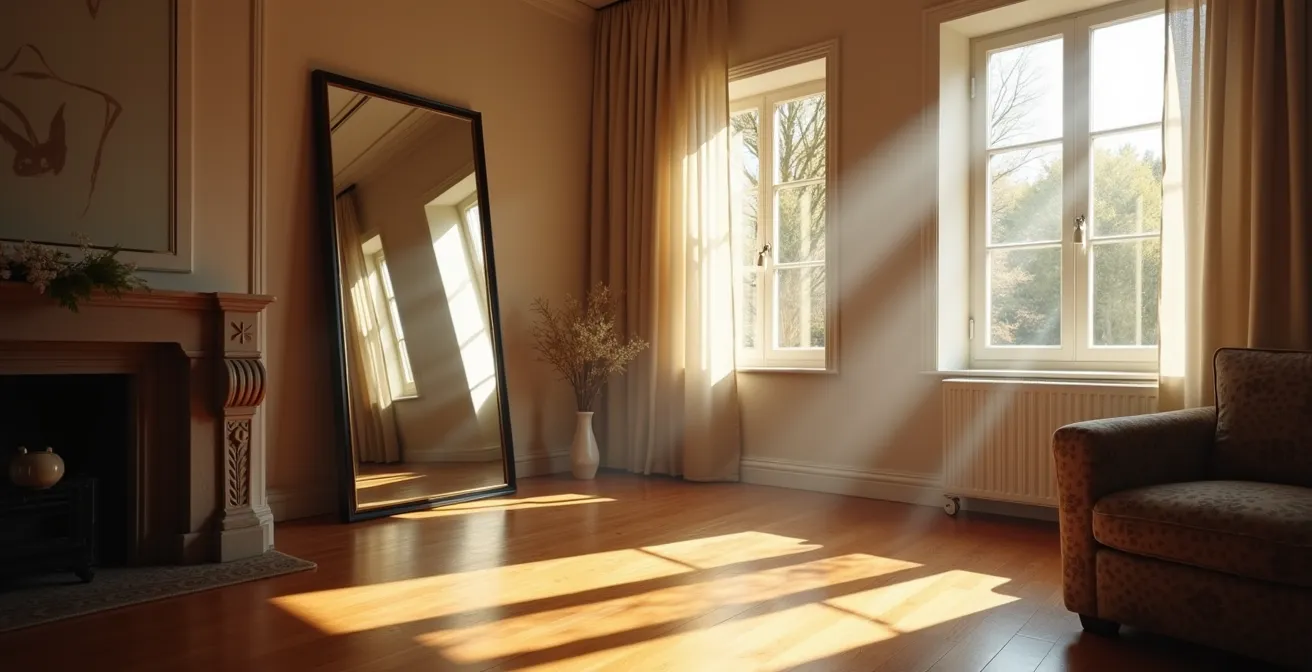
For anyone living in a north-facing apartment or a ground-floor unit, the daily struggle against dim, uninspiring spaces is real. The most common advice offered is a simple one: hang a mirror opposite a window. While this is a valid starting point, it barely scratches the surface of what’s possible. It treats a mirror as a simple decoration, a passive reflector. But what if we treated light itself not as a given, but as a vital nutrient that can be guided, shaped, and amplified to fundamentally change our environment?
This guide reframes the conversation. We will move beyond basic interior design tips to explore the principles of light architecture. This is about understanding light’s profound impact on our biology—from its ability to alleviate symptoms of depression to its role in synchronizing our internal clocks. Mirrors, in this context, become active tools. They are not just for making a room feel bigger; they are for channeling lumens into dark corners, for creating volumetric brightness, and for sculpting an environment that actively supports your health and focus.
We will dissect the science of how light interacts with our bodies and then provide concrete strategies to manage it. From choosing the right sheer curtains to creating “light scenes” for different moods, you will learn to think like a lighting architect. This approach transforms the challenge of a dark room into an opportunity to design a space that is not only brighter, but fundamentally better for you.
This article explores the complete system of light management for your home. We’ll cover everything from the biological impact of morning sun to the practical details of creating a brighter, healthier living space.
Summary: A Comprehensive Guide to Architectural Light Management for Well-Being
- Why 20 Minutes of Morning Light Reduces Depression Symptoms?
- How to Pick Sheer Curtains That Privacy Without Blocking Lux?
- Tubular Skylights or Traditional Windows: Which Adds More Light per Dollar?
- The Positioning Mistake That Creates Eye Strain on Your Monitor
- Where to Place Your Patio Chair to Catch the Winter Sun?
- How to Use Morning Sun Exposure to Reset Your Biological Clock in 10 Minutes?
- Why Breathing Forest Air Lowers Stress Hormones for 7 Days?
- How to Create “Light Scenes” for different Moods in a Multi-Use Room
Why 20 Minutes of Morning Light Reduces Depression Symptoms?
The connection between light and mood is not just a feeling; it’s a deep-seated biological mechanism. Morning sunlight is particularly potent because its specific spectrum of blue light acts as a powerful signal to the brain. It triggers the release of serotonin, a neurotransmitter that contributes to feelings of well-being and happiness, while also suppressing melatonin, the hormone that regulates sleep. This daily reset is crucial for maintaining a healthy mood, especially for those susceptible to depressive symptoms.
The therapeutic power of light is well-documented. For individuals with Seasonal Affective Disorder (SAD), a daily one-hour walk in the morning can lead to a 50% improvement in depression symptoms. The benefits extend beyond seasonal conditions. A 2024 meta-analysis in JAMA Psychiatry found that bright light therapy is a significantly effective treatment for non-seasonal major depression, achieving a 41% remission rate compared to just 23% for control treatments. This underscores that light isn’t just an aesthetic choice; it’s a clinical tool.
This daily dose of light effectively jumpstarts your daytime hormonal cycle, triggering a release of cortisol for alertness and setting a timer for melatonin production later in the evening, paving the way for restful sleep. The key is consistency and ensuring the light is unfiltered—viewing it through a window removes a significant portion of the beneficial UV spectrum. Getting outside, even on an overcast day, provides a far greater quantity of lux than staying indoors.
Action Plan: Your Morning Light Audit
- Identify Contact Points: Where can you access direct or reflected morning light? A balcony, a specific window, a nearby park? List all potential spots.
- Inventory Exposure: For three days, spend 10 minutes in your chosen spot within the first hour of waking. Note your feelings of alertness.
- Check for Coherence: Does this routine fit your schedule? If not, what is the smallest possible version you can commit to? Even 5 minutes is better than none. Prioritize outdoor exposure over window viewing for maximum effect.
- Assess Emotional Impact: Do you feel more focused or positive after? The goal is to connect the action (light exposure) with the result (improved mood).
- Integrate and Plan: Make it a non-negotiable part of your morning routine, like brushing your teeth. Position yourself facing the general direction of sunlight without staring directly at it.
How to Pick Sheer Curtains That Privacy Without Blocking Lux?
For apartment dwellers, the window treatment dilemma is a constant balancing act: how to maintain privacy from close neighbors without sacrificing precious natural light. Heavy drapes create a cave-like atmosphere, while no curtains at all can feel exposing. Sheer curtains present the ideal solution, but not all sheers are created equal. The key lies in understanding the interplay between material, weave, and color to achieve the perfect blend of light transmission and seclusion.
The goal is to diffuse light, not block it. White or off-white colors are paramount as they reflect the maximum amount of light back into the room, contributing to overall brightness. The material’s weave is just as critical. A looser weave, like that found in some linens or voiles, allows more light to pass through and can create a beautiful, dappled effect that mimics the feeling of light filtering through leaves. Tighter weaves, found in light cotton, offer more privacy but at the cost of reduced brightness. Testing fabric samples against your window at different times of the day is the only way to truly see how they will perform in your specific environment.
The following table breaks down common sheer materials to help you make an informed choice based on your primary need—be it maximizing light, ensuring privacy, or achieving a specific aesthetic.
| Material Type | Light Transmission | Privacy Level | Best For |
|---|---|---|---|
| Sheer Linen | 75-85% | Low-Medium | Maximum natural light |
| Voile | 70-80% | Low | Soft diffused light |
| Light Cotton | 60-70% | Medium | Balanced light/privacy |
| Organza | 80-90% | Very Low | Decorative light filtering |
Tubular Skylights or Traditional Windows: Which Adds More Light per Dollar?
When a room is truly starved for light, especially in spaces without access to exterior walls like hallways or internal bathrooms, more drastic solutions are needed. The two primary options are adding a traditional window or installing a tubular skylight. While a window seems like the default choice, from a pure light-per-dollar perspective, the tubular skylight is often the superior architectural solution. It works by capturing sunlight on the roof via a small, high-impact dome and channeling it down a highly reflective tube into the space below.
The qualitative difference in the light they provide is significant. A traditional window delivers directional light, creating a bright patch near the window but leaving other parts of the room in relative shadow. It casts hard-edged shadows and can be a source of glare. A tubular skylight, in contrast, delivers diffused, 360-degree light. It illuminates the entire room more evenly, creating a soft, ambient glow that feels more natural and is free of harsh shadows. This makes the entire volume of the room feel brighter, not just one section of it.
Beyond the quality of light, the cost-benefit analysis also heavily favors tubular skylights. They are significantly less expensive to install and cause minimal thermal loss compared to windows, making them more energy-efficient. Their smaller footprint on the roof also makes them a more versatile option for various home layouts.
| Feature | Tubular Skylight | Traditional Window |
|---|---|---|
| Installation Cost | $500-$1,500 | $3,000-$8,000 |
| Light Distribution | 360° diffused | Directional |
| Thermal Loss | Minimal | Significant |
| Maintenance | Low | Regular cleaning needed |
| ROI Period | 3-5 years | 7-10 years |
The Positioning Mistake That Creates Eye Strain on Your Monitor
In the modern home, managing natural light isn’t just about general brightness; it’s about ergonomics. The single biggest mistake people make is placing their monitor directly in front of or opposite a window. While facing a window seems pleasant, it creates intense backlighting that forces your eyes to strain. Placing a window directly behind you is even worse, as it creates a phenomenon known as veiling reflection—a subtle, washed-out glare on your screen that dramatically reduces contrast.
Research shows this poor positioning forces the ciliary muscles and pupils in your eyes to work constantly harder to adjust, leading to a significant increase in symptoms of digital eye strain, including headaches, blurred vision, and dry eyes. The ideal position for a monitor is always perpendicular to the main window source. This placement minimizes both direct and reflected glare, creating a more visually stable environment for your eyes.
Proper ergonomic setup goes beyond just placement. It involves a holistic approach to your visual field. Follow these key steps to create a workspace that protects your vision:
- Position your monitor perpendicular to windows, never directly in front of or opposite them.
- Maintain a distance of 20-26 inches between your eyes and the screen.
- Adjust the monitor height so the top of the screen is at or just below your eye level.
- Use adjustable blinds or sheer curtains to control dynamic glare as the sun moves throughout the day.
- Place any task lighting (like a desk lamp) to the side of your monitor, never behind it where it can create reflections on the screen.
Where to Place Your Patio Chair to Catch the Winter Sun?
For those with a patio or balcony, the low, fleeting arc of the winter sun presents a unique challenge and opportunity. Finding that perfect, warm spot is an exercise in solar architecture. It’s not as simple as just being in the sun; it’s about positioning yourself to catch both direct and reflected light, creating a “microclimate” of warmth. The sun’s angle is much lower in winter, meaning south-facing positions become prime real estate, receiving up to 40% more sunlight exposure than other orientations.
The key is to think beyond just the sun’s direct rays. A light-colored wall, a pale-tiled floor, or even a strategically placed planter can act as a natural reflector, bouncing both light and warmth onto your seating area. A south-facing wall is particularly effective, as it absorbs solar energy throughout the day and radiates it back, creating a pocket of warmth even as the air temperature drops. Placing your chair a few feet away from such a wall allows you to benefit from this radiant heat while still being in the direct path of the sun.
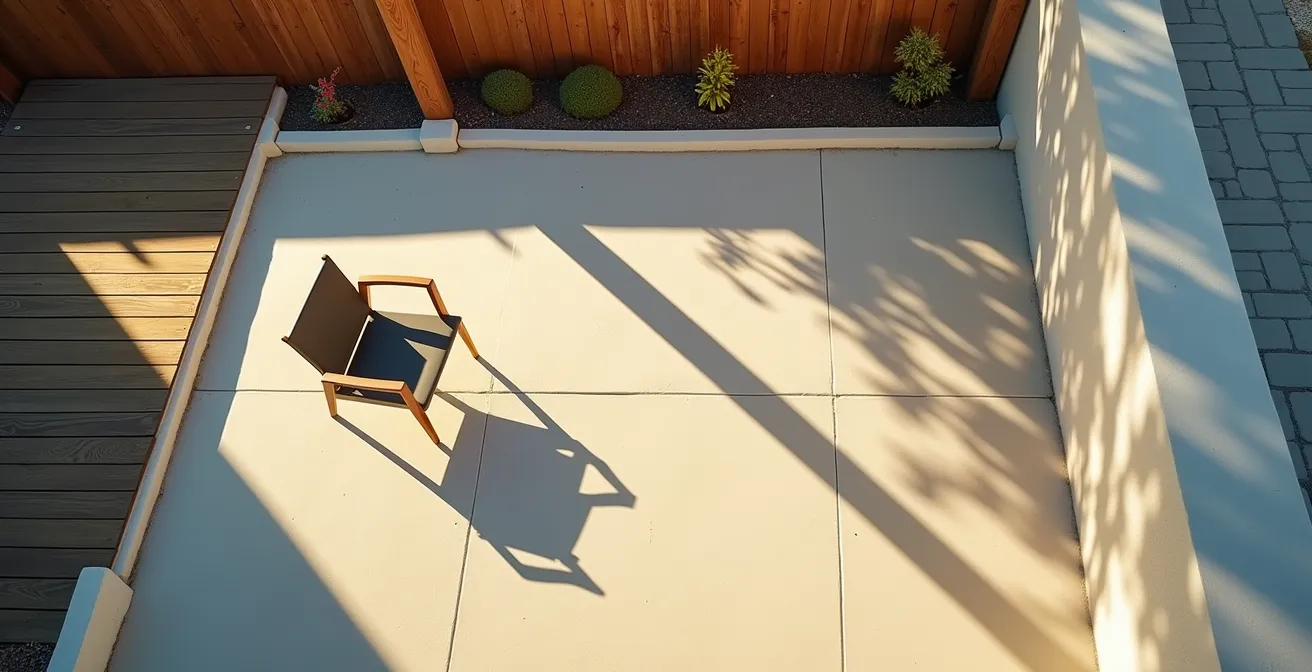
To find your perfect winter oasis, you must become a student of your own space. Mapping the sun’s path and identifying these intersections of direct and reflected energy will allow you to maximize your enjoyment of those precious sunny winter days.
- Map Solar Positions: On a clear day, note where the sun falls on your patio at 9 AM, 12 PM, and 3 PM. Use chalk or temporary markers.
- Identify Heat Sinks: Locate spots where direct sun meets a surface that reflects heat, such as a light-colored wall or stone pavers.
- Position for Warmth: Place your chair 2-3 feet from a south-facing wall within your mapped sun patch for maximum combined warmth.
- Create Wind Barriers: Use planters or small screens to block chilly breezes without obstructing the sun’s path.
How to Use Morning Sun Exposure to Reset Your Biological Clock in 10 Minutes?
Every cell in your body operates on an internal clock known as the circadian rhythm. This rhythm, however, is not perfectly 24 hours long; for most humans, it’s slightly longer. This means that every single day, it needs to be reset, or “entrained,” to the 24-hour solar cycle. The most powerful signal for this daily reset is bright light exposure within the first hour of waking. Without this signal, your internal clock begins to drift, leading to difficulty falling asleep, trouble waking up, and afternoon slumps.
You don’t need hours of exposure to achieve this effect. A short, intense dose of morning sunlight is enough to send a clear signal to the suprachiasmatic nucleus—the master clock in your brain. This quick exposure triggers a cascade of hormonal events that define your entire day and night, powerfully regulating your sleep-wake cycle and improving overall alertness.
This simple, 10-minute protocol can have a transformative impact on your energy levels and sleep quality. The key is to make it a consistent, non-negotiable habit. Here’s how to do it effectively:
- Time it Right: Step outside within the first 30-60 minutes of waking for the maximum biological effect.
- Expose Your Skin: Aim for 5 to 15 minutes of sunlight on your arms, hands, and face.
- Face the Light: Orient yourself toward the sunrise. You don’t need to look directly at the sun, just have it in your general field of vision.
- Remove Barriers: Take off sunglasses or regular glasses if possible. The photoreceptors in your eyes that signal the brain are most sensitive to the full spectrum of unfiltered light.
- Incorporate Movement: A gentle walk or simple stretching while you get your light can enhance the benefits and help you wake up.
Key Takeaways
- Morning light is a non-negotiable tool for mood and sleep regulation, with clinically proven benefits.
- Effective light management is a system: mirrors, curtains, and even indoor plants must work in concert to sculpt your environment.
- Strategic mirror placement is about creating channels and amplifying light where it’s needed most, not just reflecting a window.
Why Breathing Forest Air Lowers Stress Hormones for 7 Days?
The restorative effect of nature, often called “forest bathing” or Shinrin-yoku, is more than just a poetic notion. It is a measurable physiological phenomenon driven by airborne compounds called phytoncides. These are antimicrobial organic compounds released by trees and plants to protect themselves from pests and disease. When we inhale these molecules, they trigger a remarkable response in our own bodies.
Scientific research has shown that exposure to phytoncides has a direct and lasting impact on the human immune system and stress levels. Studies confirm that after spending time in a forest environment, participants show a significant increase in the activity of Natural Killer (NK) cells—a type of white blood cell crucial for fighting tumors and infections. Simultaneously, they exhibit a marked reduction in stress hormones like cortisol, with these positive effects being measurable for up to seven days after a single exposure.
While escaping to a forest isn’t always feasible, the core principle—biophilic design—can be replicated indoors. The goal is to simulate the visual effects of a forest canopy, creating dappled, dynamic light that calms the nervous system. Mirrors are a surprisingly effective tool in this endeavor, turning a few houseplants into a lush, light-scattering feature.
- Position mirrors to reflect your indoor plants, creating the illusion of more greenery and bouncing green, calming light into the room.
- Use perforated screens or blinds between a window and a mirror to create complex, dappled light patterns that shift throughout the day.
- Angle mirrors to catch and scatter the shadows of plants, adding a layer of dynamic visual interest.
- Combine multiple small mirrors at different angles to mimic the fragmented light of a forest canopy.
How to Create “Light Scenes” for different Moods in a Multi-Use Room
The ultimate expression of light architecture is the ability to create distinct “light scenes” tailored to different activities and moods within a single room. In a modern apartment, a living room may need to function as a home office, a reading nook, a dining area, and a space for entertainment. Each of these functions benefits from a different quality of light. This is achieved by layering different light sources and using mirrors to modulate and direct both natural and artificial light.
The two key variables you can control are color temperature (measured in Kelvin) and brightness. Cool, bright light (4000-5000K) mimics daylight and promotes focus and alertness, making it ideal for work. Warm, dim light (2200-2700K) emulates candlelight or a sunset and encourages relaxation and unwinding. Smart bulbs and dimmer switches are the primary tools for controlling these variables, while mirrors act as the shapers and amplifiers.
For example, a mirror placed behind a desk lamp can double the effective task lighting for focus work. A large mirror positioned opposite a cozy reading nook can capture the warm light from a floor lamp and create an enveloping, soft glow. When entertaining, angling mirrors away from the TV screen prevents glare while still reflecting ambient accent lighting around the room, creating a sophisticated atmosphere. As interior design expert Pamela Lynn notes:
If you want to maximize the natural light then place the mirror across from a window. This will bounce the beautiful, distilled light.
– Pamela Lynn, Interior Design Expert
This fundamental principle of reflection, when combined with the control of artificial light, allows you to become the true architect of your room’s atmosphere. The table below provides a starting point for designing your own light scenes.
| Scene Name | Color Temperature | Brightness Level | Mirror Position |
|---|---|---|---|
| Focus/Work | 4000-5000K | High (80-100%) | Behind desk lamp |
| Relax/Read | 3000-3500K | Medium (50-70%) | Opposite reading nook |
| Evening/Unwind | 2200-2700K | Low (20-40%) | Reflecting accent lights |
| Entertainment | 2700-3000K | Variable (30-60%) | Away from screen glare |
By moving beyond simple decoration and embracing the principles of light architecture, you can actively transform your home into a space that not only looks brighter but actively works to improve your mood, focus, and overall well-being. Start today by choosing one room and beginning to sculpt its light.